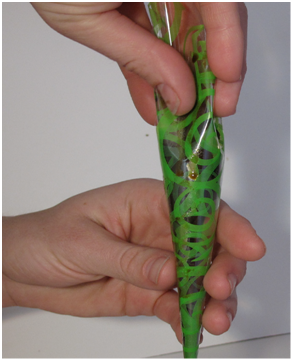
Sunday, October 6, 2013

Henna Mehndi - Natural dye for body art Part 3


 How to Apply Henna?

As we all know it is always good to begin with the basics. You can create your own free hand intricate designs with a little bit of practice. Soon you can mix and match these simple patterns to create a variety of complex designs. Learning basics of mehndi is just like learning to write the alphabet. Keep practicing each design several times till you get it perfectly If you take a little time to learn your fundamentals your mehndi design flow will easily look great!

Look at the simple designs that are given below. Practice these simple shapes like teardrops, dots and swirl on a paper with a marker or with the henna cone; this will help build your ‘muscle memory’.

Trace over your marker lines with henna paste on the paper until you’re comfortable with the flow of the henna and the pressure required. Try to remember the pressure that is required to create each of these designs.


Here are some advanced designs. Try these if you think you are ready!


Why to seal henna applying the designs?

In 20 - 30 minutes the mehndi paste will lose its shine and will become dry. Once it’s dried, the design should be sealed with medical tapes.

This ‘bandage’ prevents the mehndi paste from smearing or flaking off, and protects bedcovers and clothing from becoming stained.

Otherwise, a mixture of sugar and lemon juice can be used to seal the mehndi paste which will help it to adhere to the skin.

Ensure to seal any firm areas like wrists, hand, legs and feet with medical tape. Put two inch strips of tape slightly overlapping each other across the pattern gently.

Slide a nylon or sock on the wraps to hold the bandage in place. The tape will help to prevent cracking off too quickly.

Finally remove the paste after 6 to 12 hours. Keep the paste on the skin as long as possible for best results. Sleeping the paste on is advisable for deep stains.
Remove the paste gently by moistening the skin with vegetable oil or lemon juice. DO NOT USE WATER to remove the mehndi as it will ruin the stain and will not allow the color from darkening. Try to avoid water for the first 24 hours for best results.

Enjoy the mehndi which will stay for about 7-10 days!

Henna Mehndi - Natural dye for body art Part 2

Today we will look at how to store henna and how to make henna cone to get those beautiful designs…

 How to Store Henna?


Keep fresh henna powder or henna paste in the freezer. It can be stored in a plastic applicator bottle or in cones and it should be sealed well. Wrap tightly to protect from light and moisture. Henna is perishable, so protect it from heat and light. Once opened, try to use it within 6-12 months for best results.

How to Mix Henna Paste?

1. Henna should be mixed 24 hours prior to use to get the best results. Get the below mentioned ingredients ready. Mix these ingredients into a fine paste and put it in a zip lock bag.
         
          20 grams packet of mehndi
1.5 teaspoons sugar
1/4 cup fresh lemon juice
1.5 teaspoons of essential Oils used to mix henna      

2. Watchfully mix the ingredients in the bag. Now continue to carefully mix the paste by massaging the bag until all the lumps are removed.

3. Keep the bag of henna paste in a warm place for 24 hours (on 70 to 80 degrees Fahrenheit).

4. After 24 hours has passed, open one small corner of the bag and fill your applicator bottle or the henna cone.

5. Now make beautiful henna body art!

6. Keep the leftover henna paste in the freezer to be used another time.

Not sure how to fill the storage carrot bag? Do not worry; here is how it is made…


 1.   Inside a tall glass place a large zip lock bag or storage carrot bag.

2.   Next step is to fold the top edge over the glass (Just as shown in the second image) so that it will stand up straight and will not collapse.

3.   Now pour the prepared mehndi paste into the bag.

4.   Completely lock the bag by twisting the tail 1 or 2 full twists above the filled portion.

5.   Close the bag with a knot or small rubber band. Then cut about 1/4 inch or preferably less off the tip of the storage carrot bag to fill the cones or applicator bottles.
Now get the cone ready to make the designs…


Gather cones, henna, a narrow glass, and rubber bands/tape.


Make several cones stand in the glass until there are enough cones that they support themselves. Then make sure the center cone stays upright to be filled with henna.


Now insert the storage carrot bag that is filled with henna down into the center cone and squeeze in henna paste gently.


Fill the cone about half to 3/4’ths full of the cone. Be watchful not to overfill the cone.

Points to remember: Try to keep the sides of the cone clean. Ensure the paste does not get to the edge of the cone making it a mess.


Now take hold of the end of the cone and squeeze it together the excess, empty Mylar.


Squeeze the empty end/tail tightly. To tightly seal the cone, squeeze and twist the Mylar. Be careful not to let any mehndi paste squeeze up to the end of the tail.


Seal the cone with a small rubber band. Ensue to wrap the rubber band on multiple times to ensure the cone is completely sealed and no mehndi explodes out while you make your designs.
As you use up the paste, keep sliding the rubber band down to maintain full pressure in the cone. 

Now you are all set to make your own mehndi designs!